Chapter 5 Built-in Damping and Gravity
1. D'Alembert의 원리 : 파티클에 대해, 한 오브젝트에 여러 힘이 작용한다면, 그 모든 힘을 합하여 단일의 힘으로 쓸 수 있다.
2. Force Generator : force가 어디에서 오고, 그 force type에 따라 어떻게 처리하는지 알고있다.
3. Simplified model of drag
Chapter 6 Springs And Springlike Things
1. Hook's Law : 한 spring에 발휘되는 힘은 spring의 rest position으로부터 extended되거나 compressed된 거리에만 의존한다.
즉,
3차원에서
가 된다.
원작자의 코드를 따라한다면, real_abs(d - l_0)를 통해서, 스프링이 계속 왔다갔다 하게 만드는데, 우리가 생각하는 한 고정점이 있고, 그 고정점으로부터 스프링으로 연결된 오브젝트를 떠올렸을 때 그 real_abs를 없애야 한다. 즉, 코드가
void GPED::ParticleSpring::updateForce(GPEDParticle* particle, real duration)
{
 // Calculate the vector of the spring
 glm::vec3 force = particle->getPosition();
 force -= other->getPosition();

 // Calculate the magnitude of the force.
 real magnitude = glm::length(force);
 magnitude = magnitude - restLength;
 magnitude *= springConstant;

 // Calculate the final force and apply it.
 force = glm::normalize(force);
 force *= -magnitude;
 particle->addForce(force);
}
코드가 이럴 때, compressed된 상황을 가정해보면, magnitude는 restLength보다 작게 되어서, magnitude값에는 -값이 들어가게 된다. 그리고 나중에 훅의 법칙에 따라 또 -가 곱해지는데 그렇게 되어서 +가된다. 가정을 미리했어야 했는데, 고정된 게 anchor가 y축 더 위에 있고, 연결된 오브젝트가 y축 아래에 있다면 force를 포지션의 차이로 구했을 때 음의 방향을 가리키고 있다. 따라서, 최종적으로 -방향 그러니까 아래방향으로 force가 작용해서, 다시 벌어지게 되고 일반적으로 상상하는 spring이 된다.
그러나, real_abs(magnitude - restLength)를 하게 된다면, + 방향이 되어서 anchor를 지나 위로 올라가게 된다. 나중에 그러한게 필요하다면 따로 함수를 만들어서 사용하면 되겠다. 그런데 일반적인 상황을 상상하니 위의 코드를 유지하도록 해야겠다.
Demo를 위해서,
GPED::ParticleForceRegistry reg;
GPED::GPEDParticle particle;
particle.setDamping(0.8);
particle.setMass(0.5);
particle.setPosition(glm::vec3(0, 10, 0));
GPED::GPEDParticle particle2;
particle2.setDamping(0.8);
particle2.setMass(0.5);
particle2.setPosition(glm::vec3(2, 1, 0));

GPED::ParticleSpring pspring(&particle, 0.5, 5);
GPED::ParticleSpring pspring2(&particle2, 0.5, 5);

reg.add(&particle2, &pspring);
reg.add(&particle, &pspring2);
위와 같이 설정을 한다면, 우리가 spring으로 연결된 두 오브젝트를 볼 수 있게 된다. 움직임은 다음과 같이 보여진다:
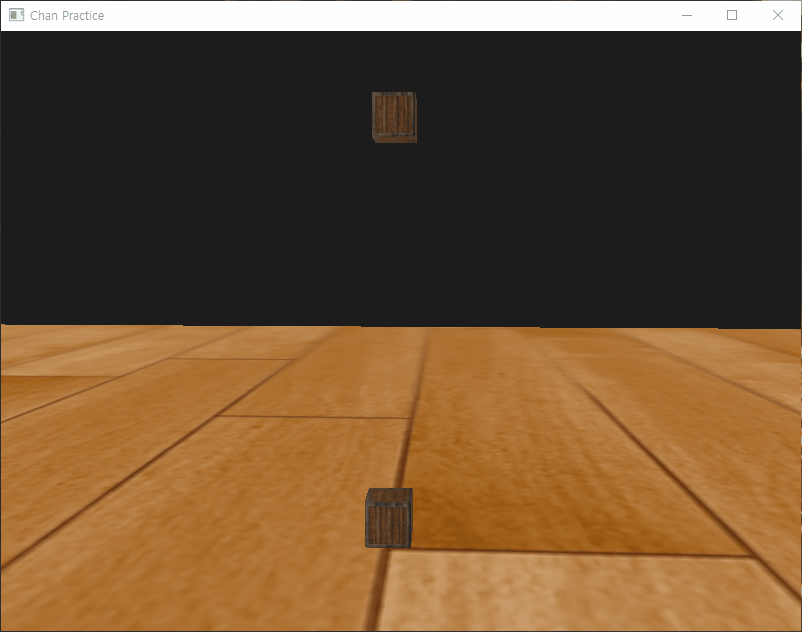
시간이 지나서, 두 오브젝트들은 restLength에 맞추어져서 정지하게 된다.
2. 탄성한계 : 스프링이 일정 수준 이상으로 extend되거나 compress된다면 스프링의 탄성한계를 넘어버리고, 스프링이 변해버려서 그 탄성이 유지되지 않는데, 이러한 정교한 것은 car physics에 쓰이기 때문에, 굳이 구현할 필요가 없다.
3.Other Springs
- Anchored Spring도 위에서 설명한대로 코드를 바꾸어야 한다.
그냥 Particle Spring과 Anchored Particle Spring을 넣어서 실행시킨 gif:

그리고 적당한 시간이 지나면 restLength를 유지한 채로 멈추게 된다.
- Bungee Spring
Bungee Spring도 코드가 잘못되어있다.
magnitude = springConstant * (restLength - magnitude);
restLength와 magnitude를 뺄셈하는게 반대로 되어있다. 그래서 만약 이 코드로 실행시킨다면 bungee로 연결된 파티클 들 중 하나는 멀리 날아가게 된다. 그래서 저 뺼셈을 반대로 바꾸어야 한다.
void GPED::ParticleBungee::updateForce(GPEDParticle* particle, real duration)
{
 // Calculate the vector of the spring
 glm::vec3 force = particle->getPosition();
 force -= other->getPosition();

 // Check if the bungee is compressed
 real magnitude = glm::length(force);
 if (magnitude <= restLength) return;

 // Calculate the magnitude of the force.
 magnitude = springConstant * (magnitude - restLength);

 // Calculate the final force and apply it
 force = glm::normalize(force);
 force *= -magnitude;
 particle->addForce(force);
}

맨 위에 있는 particle은 anchor spring에 연결되어 있고, 맨 위와 중간에 있는 파티클은 basic spring에 연결되어있다 그래 중간과 마지막 파티클이 bungee spring에 연결되어 있다. bungee spring은 pulling하는 힘만을 만들어낸다. 그래서 restLength보다 작은 것에 도달하게 된다면, 그 거리를 거의 유지하고 push되어지지 않는다.
- Buoyancy
이 buoyancy는 상당히 잘못되어 있는게 많았다. 내 생각엔 이 챕터가 상당히 문제가 있다고 생각한다. 설명도 코드들도. 어쨋든 나는 여러자료들을 찾았고 다음과 같은 결과를 만들어낼 수 있었다.

파란색 선은 water height를 나타내고, 하얀색 선은 particle의 center position을 명확히 보여주기 위해 렌더링했다.
위의 안정된 퍼포먼스를 만들기 위해 다음의 두 자료를 참고했다.
- http://www.iforce2d.net/b2dtut/buoyancy
- https://box2d.org/downloads/ // 이 링크의 맨 밑의 buoyancy demo가 있다.
- Game Programming Gems 6 - Exact Buoyancy for Polyhedra (Erin Catto, Crystal Dynamics)
어쨋든 box2d 구현자가 대부분의 명확한 buoyancy를 한 것 같다. 그래서 여기에서 부력에 대한 설명은 책이 아닌 저 책을 기반으로 한다.
부력, Buoyancy는 아르키메데스의 원리라고 불려지는 것에 의해서 구해진다.
여기에서 p는 물의 밀도이고, V는 body의 잠긴 부분의 부피, g는 중력가속도(보통 9.8 또는 10) n은 (0,1,0)의 upVector이다.
이 식에 나타내는 것은 이동된 fluid의 무게를 말한다. 저 위의 데모들은 3차원 rigid body
대한 것이여서, V를 구하기 위해 좀 어려운 방법을 사용하는데, 나는 우선 파티클에 대해서 부력을 구하기 때문에, 간단하게 근사시키로 했다.
파티클을 하나의 구로 생각하는데, 이제 그거를 1차원으로만(y축) 생각한다. 그래서 그 파티클은 반지름과 자신의 center position을 가지고 있는데, 이것을 이용해서 water height에 대해 잠긴 높이를 구할 수 있다. 일단 코드를 보자면
void GPED::ParticleBuoyancy::updateForce(GPEDParticle * particle, real duration)
{
 // Calculate the submersion depth.
 real depth = particle->getPosition().y;

 // Check if we're out of the water.
 if (depth - particleRadius >= waterHeight) return;
 glm::vec3 force(0.0);

 // Fully Submerged
 if (depth + particleRadius <= waterHeight)
  force.y = liquidDensity * (particleRadius * 2) * 10.0; // gravity 10
 else // Partially Submerged
  force.y = liquidDensity * (waterHeight - (depth - particleRadius)) * 10.0; // gravity 10


 // http://www.iforce2d.net/b2dtut/buoyancy
 // Refer to the tutorial of buoyancy. the drag is approximation.
 // water velocity is assumed by (0, 0, 0)
 // https://box2d.org/downloads/
 // Refer to the buoyancy demo of Eric Catto
 // the water linear drag is 5.0
 float dragForce = (particle->getMass() * 5.0) * (-particle->getVelocity().y);
 force.y += dragForce;

 particle->addForce(force);
}
첫 번째 if문에서, depth - particleRadius는 원의 가장 밑 부분을 의미하는데, 그것이 waterHeight보다 높다면, 파티클은 물의 밖에 있는 것이기 때문에, return하여 계산하지 않는다.
두 번째 if문에서는 완전히 잠겨있는지 아니면 부분적으로 잠겨있는지를 검사한다.
depth + particleRadius는 원의 가장 윗 부분을 의미하는데, 그것이 waterHeight보다 작다면, 완전히 파티클이 잠긴 것이 된다. 그래서 파티클의 부피를 radius * 2로해서 그 원의 y축 전체를 부피로 잡아서 식을 넣는다.
아니라면, 부분적으로 잠긴것이기 때문에, 물 높이에서, 원의 가장 아랫 부분의 높이를 빼서 물에 잠긴 y축 길이를 구하게 된다.
어쨋든 나는 물에 잠긴 y축의 길이를 부피로 근사하여서 하고 있는 것이다.
여기까지만 코드가 있다고 가정한다면, 파티클은 물 위 까지 튀어오르게 된다.
그래서 나는 레퍼런스를 통해서, drag를 토해서 이것을 방지하게 된다는 것을 알게 되었다. 자료들에서는 rigid body이기 때문에 linear drag와 angular drag 둘 다를 계산하지만, 나는 파티클이기 때문에 linear drag만 구현한다.
나는 데모 코드에서 이 linear drag를 참고했다.
// Compute the buoyancy and drag forces.
void ComputeBuoyancy(RigidBody& body, Polyhedron& poly,
      WaterVolume& water, float gravity)
{
 Vec3 c;
 float volume = SubmergedVolume(c, body.x, body.q, poly, water.plane);

 if (volume > 0)
 {
  Vec3 buoyancyForce = (water.density*volume*gravity)*water.plane.normal;

  float partialMass = body.mass * volume / poly.volume;
  Vec3 rc = c - body.x;
  Vec3 vc = body.v + body.omega % rc;
  Vec3 dragForce = (partialMass*water.linearDrag)*(water.velocity - vc);

  Vec3 totalForce = buoyancyForce + dragForce;
  body.F += totalForce;
  body.T += rc % totalForce;

  float length2 = poly.length*poly.length;
  Vec3 dragTorque = (-partialMass*water.angularDrag*length2)*body.omega;
  body.T += dragTorque;
 }
}
이 코드에서 dragForce를 구할 때, rc는 relativeCenter를 말한다. 즉 그러니까 body의 center of mass와 물에서의 center of buoyancy가 다르기 때문에 그것을 고려해준다. 이것은 나중의 torque를 위해서 쓰인다.
vc는 몸체의 속도와, 회전까지 고려한 속도인 것 같은데,
linear Drag를 구하기 위해서
(잠긴 부피의 무게 * 물의 linearDrag 계수) * (물의 속도 - 몸체의 속도)
하게 된다.
물의 속도는 (0, 0, 0)으로 정지해 있다고 가정되고, 몸체의 속도는 파티클이기 때문에 그냥 linear velocity만 이용한다. 그리고 오른쪽 항은 -몸체의속도만 하게 된다.
지금, partialMass를 구하지 않고 그냥 파티클의 무게만으로 했는데, 이것을 이제 다시 처리해서 하니까 훨씬 더 부력같은 결과가 나왔다. 그래서 코드도 다음 처럼 바꾸었다.

/**
 * A force generator that applies a buoyancy force for a plane of
 * liquid parallel to XZ plane.
 */
class ParticleBuoyancy : public ParticleForceGenerator
{
 /**
  * Consider a particle as a sphere, and it has a radius
  * With this variable, the submerged part of a particle is
  * determined.
  */
 real particleRadius;


 /**
  * The height of the water plane above y = 0. The plane will be
  * parallel to the XZ plane.
  */
 real waterHeight;

 /**
  * The linear Drag of Water
  */
 real linearDrag;

 /**
  * The density of the liquid.Pure water has a density of
  * 1000 kg per cubic meter.
  */
 real liquidDensity;

public:
 /** Creates a new buoyancy force with the given parameters */
 ParticleBuoyancy(real radius, real linearDrag, real waterHeight, real liquidDensity = 1000.0f);

 /** Applies the buoyancy force to the given particle.*/
 virtual void updateForce(GPEDParticle* particle, real duration);
};
void GPED::ParticleBuoyancy::updateForce(GPEDParticle * particle, real duration)
{
 // Calculate the submersion depth.
 real depth = particle->getPosition().y;
 real partialMass = particle->getMass();

 // Check if we're out of the water.
 if (depth - particleRadius >= waterHeight) return;
 glm::vec3 force(real(0.0));

 // Fully Submerged
 if (depth + particleRadius <= waterHeight)
 {
  force.y = liquidDensity * (particleRadius * 2) * real(10.0); // gravity 10
 }
 else // Partially Submerged
 {
  real V = (waterHeight - (depth - particleRadius));
  force.y = liquidDensity * V * real(10.0); // gravity 10
  partialMass *= V / (particleRadius * 2);
 }

 // http://www.iforce2d.net/b2dtut/buoyancy
 // Refer to the tutorial of buoyancy. the drag is approximation.
 // water velocity is assumed by (0, 0, 0)
 // https://box2d.org/downloads/
 // Refer to the buoyancy demo of Erin Catto
 // the water linear drag is normally 5.0, according to the demo
 float dragForce = (partialMass * linearDrag) * (-particle->getVelocity().y);
 force.y += dragForce;

 particle->addForce(force);
}
partialMass를 구할 때 비율로 구했는데, V가 잠긴 높이이고, (particleRadius * 2)가 파티클 y축의 전체 높이이기 때문에, V / (particleRadius * 2)로 비율을 곱해주고, 그 비율만큼 원래 파티클의 무게에 곱해주면, partialMass가 구해진다.
그래서 GIF에서도 보이듯이 더 부력같아 보인다.
나중의 Rigid Body에서의 Buoyancy force generator를 구현하려면 저 레퍼런스를 참고해서 구현하도록 하자.
- Stiff Spring, Faking Stiff Spring
Stiff Spring을 구현하기 위해서, 스프링 물리학의 Simple Harmonic Motion과 Damped Harmonic Motion을 이해해야 하고, 그것을 적용해야 한다. 상당히 물리적인 내용이라서 이해하고 적용시키는데 시간이 걸릴 거 같다.
일단 원작자의 코드를 써서 시도를 해봤는데, 정상적으로 작동하지 않는다. 그리고 데모가 있다고 했는데, 소스에는 데모 프로그램이나 코드가 없다. 그래서 이 파트는 그냥 넘겨버리는게 좋을 것 같다.
Chapter 7 Hard Constraints
- Closing Velocity (가까워 지는 속도)
두 오브젝트가 함께 움직이는 total speed (scalar quantity)
두 오브젝트가 떨어질 때 음의 값을 가진다.
한 오브젝트에서 다른 것으로 가는 방향의 컴포넌트들의 속도를 찾아서 계산
- Separating Velocity (떨어지는 속도)
Closing Velocity에 -1을 곱해 의미를 바꾼다 (좀 더 직관적으로 코드에서 쓰기 위해)
양수이면 두 오브젝트가 떨어지고 있고, 음수면 가까워지고 있따.
- 복구 계수
운동량 보존 법칙
하지만 이 운동량 보존 법칙은 개별 속도에 대해서 말해주지 않는다. 그래서
separating velocity를 이용한다
v'_s 는 충돌 후 separating velocity이고,
v_s는 충돌 전 separating velocity
c는 Coefficient of Restitution(복구 계수) 이다.
- Contact Normal
전통적으로 두 개의 오브젝트가 있을 때 (a,b) a이ㅡ 관점에서 contact normal를 정한다
즉, p_b -> p_a로 가는데, Contact Normal의 관점에서 p_b에서 p_a로 들어가므로 p_a가 이제 가야할 (충돌되어 튕기는) 방향이다.
이것은 separating velocity를 contact normal 방향으로 사영시킨다고 보면 된다.
- Impulse (충격)
Force -> Acceleration Change -> Velocity Change : Force Based Collision Resolution
Impulse -> Velocity Change : Impulsive Collision Resolution
g는 impulse이다.
Force가 없다면 Acceleration이 없다. (중력도 사실 Force라는 것을 생각)
D'Alembert의 원리를 사용하여 모든 forces를 합쳐서 Total Acceleration을 구할 수 있다.
However,
Impulse가 없더라도 계속해서 velocity를 가질 수 있다.
그러나, D'Alembert의 원리를 이용하여 impulses를 합치는 것은 속도에서의 총 '변화'이다.
즉, New Velocity = Current Velocity + impulse * inverseMass;
- Resolution Step
1) Resolve Velocity
- Separating Velocity 계산 if(V_s > 0) // 떨어지고 있다면 return
- New Separating Velocity = - Separating Velocity * Restitution
- Micro Collision Approach : accCaused Separating Velocity if(accV_s < 0) newVs += restitution * accCaused SepVelocity;
- deltaVelocity = newV_s - V_s;
- totalInverseMass 계산
- 단위 질량당 충격략 계산 Impulse = deltaVelocity / totalInverseMass
- Contact Normal 방향의 impulse 만들기 impulseIMass = ContactNormal * Impulse
- New Velocity = Current Velocity + impulse * inverseMass
Resting Contacts는 Micro Collision Approach로 해결.
Simultaneous Resolution Approach는 Force Based로 Resting Contacts를 해결함.
// Check the velocity build-up due to acceleration only
glm::vec3 accCausedVelocity = particle[0]->getAcceleration();
if (particle[1]) accCausedVelocity -= particle[1]->getAcceleration();
real accCausedSepVelocity = glm::dot(accCausedVelocity, contactNormal) * duration;

// If we've got a closing velocity due to acceleration build-up,
// remove it from the new separating velocity,
if (accCausedSepVelocity < 0)
{
 newSepVelocity += restitution * accCausedSepVelocity;

 // Make sure we haven't removed more than was
 // there to remove.
 if (newSepVelocity < 0) newSepVelocity = 0;
}
2) Resolve Interpenetration
depth < 0 : No Interpenetration
= 0 : touching
> 0 : Interpenetration
각 오브젝트가 관통을 해결하기 위해 움직이게 하는 양이 penetration depth(d)이다.
이 때 질량의 반비례로 움직이는 양을 조절해준다.
- Total Inverse Mass 계산
- 단위 Inverse Mass당 Move량 계산
- Set Position
- Contact Resolver Algorithm
- Select the most sever contact first (가장 낮은 V_s velocity, 즉 가장 음수의)
- 가장 낮은 separating velocity가 0 이상이라면, 우리는 끝났으니 알고리즘 종료
- Apply impulses to detects ( + Micro Collision Resolution)
- Interpenetration Resolution Function
- Interpenetration Resolution으로 이동된 양 만큼 Contact 수정
- 좀 더 많은 iterations이 남았다면 1로 되돌아가기.
- Time-Division Engines
이 책에서 설명하는 Contact Resolution 알고리즘과 다른데, 요지는 충돌 탐지를 항상 써서 충돌이 발생할 때 마다 해결하므로, 시간 소모가 많아서 정말 물리적인 시뮬레이션을 구현할 때 아니면, 게임에서 대부분 쓰지 않는다고 한다.
- Cables
두 개의 오브젝트가 그것의 길이에서 더 이상 멀어지지 않게 하는 constraint이다. 즉, 케이블이 팽팽하게 잡아당겨졌을 때, 더 이상 분리될 수 없다. 간단하게 상상으로 말하자면, light한 철로 연결된 두 오브젝트를 생각해보자. 그러면 그 두 오브젝트들은 가까워질 수 있는데, 멀어질 수 없다. 이 때 탄성 계수를 이용해서 이 케이블을 모델링한다.
그래서, 멀어지면 가까워지도록 해야하기 때문에, contact normal이 반대로 된다. 그리고 interpenetration depth는 그 케이블이 limit을 넘어서 얼마나 연장되었는지가 된다.
unsigned GPED::ParticleCable::addContact(ParticleContact* contact, unsigned limit) const
{
 // Find the length of the cable
 real length = currentLength();

 // Check if we're over extended
 if (length < maxLength) return 0;

 // Otherwise return the contact
 contact->particle[0] = particle[0];
 contact->particle[1] = particle[1];

 // Calculate the normal
 contact->contactNormal = glm::normalize(particle[1]->getPosition() - particle[0]->getPosition());;
 contact->penetration = length - maxLength;
 contact->restitution = restitution;

 return 1;
}
- Rods
Rod(막대)는 케이블과 충돌들의 행동을 결합한다. rod에 연결된 두 오브젝트들은 분리되지도 가까워지지도 않는다. 그것들은 고정된 거리를 유지한다. 앞에서 말한 부서지지 않는 그냥 막대라고 상상하면 된다.
그런데 그냥 막대 이므로, 복구 계수는 0을 만들어야 한다. 왜냐하면 막대로 연결된 두 오브젝트가 튕겨나가게 하면 안되기 때문이다.
unsigned GPED::ParticleRod::addContact(ParticleContact * contact, unsigned limit) const
{
 // Find the length of the rod
 real currentLen = currentLength();

 // check if we're over-extended
 if (currentLen == length) return 0;

 // Otherwise return the contact
 contact->particle[0] = particle[0];
 contact->particle[1] = particle[1];

 // Calculate the normal
 glm::vec3 normal = glm::normalize(particle[1]->getPosition() - particle[0]->getPosition());

 // The contact normal depends on whether we're extending or compressing
 if (currentLen > length)
 {
  contact->contactNormal = normal;
  contact->penetration = currentLen - length;
 }
 else
 {
  contact->contactNormal = normal * real(-1.0);
  contact->penetration = length - currentLen;
 }

 // Always use zero restitution (no bounciness)
 contact->restitution = 0;

 return 1;
}
댓글 없음:
댓글 쓰기